9/25/2011

First Look INSIDE The Attic of 2011

I'm excited to share the first picture of Halloween 2011 - Inside the Attic.
Work is progressing on cluttering up the attic...


9/20/2011

999 Happy Haunts

Thanks everyone for your continued interests in my Halloween Haunt endeavor. With your help, we've reached 999 visitations to this site (not counting my own)! 

But there's room for a thousand... Any volunteers???

9/19/2011

Ouija Board Crate

First off, my apologies for getting this post out late. It's just been very crazy with the start of the school year again. So much to do!

This week, work completed on the Ouija Board Crate. This crate will now serve as a permanent home for the Ouija Board - the centerpiece effect of the attic scene. Note that before we'd just use a cardboard box - and get a new one year after year. Now, we have something that is themed a bit better - a "plussing" of a prop, to throw around an Imagineering term.

For a formal definition, we can turn to the Liar's Guide to Disneyland...
"Plussing" something means making it a little bit better. For example, a Mickey Mouse hat plusses a guest's head (24).

With that term defined, let's move onto the construction process of this original prop.
We started by staining the four posts of the box, which are constructed of two pieces of wood nailed together to form an "L" shape.


 After that was completed, we did a color test by staining one of the pieces of compressed wood that is being used for the boards, or sides of the box. The board just soaked up the stain, leaving it a dark purple in color. That would not do, so we decided against staining the boards.


We then created a stencil out of computer paper for the word "attic" - so the audience knows they're looking into an attic scene (Note: only one other box in the attic scene has the word "attic" spray painted onto it that is still around. When the attic scene first debuted in 2007, the original Ouija Board cardboard box had "attic" spray painted on as well, but in 2008 and 2010, we never got around to adding it again).


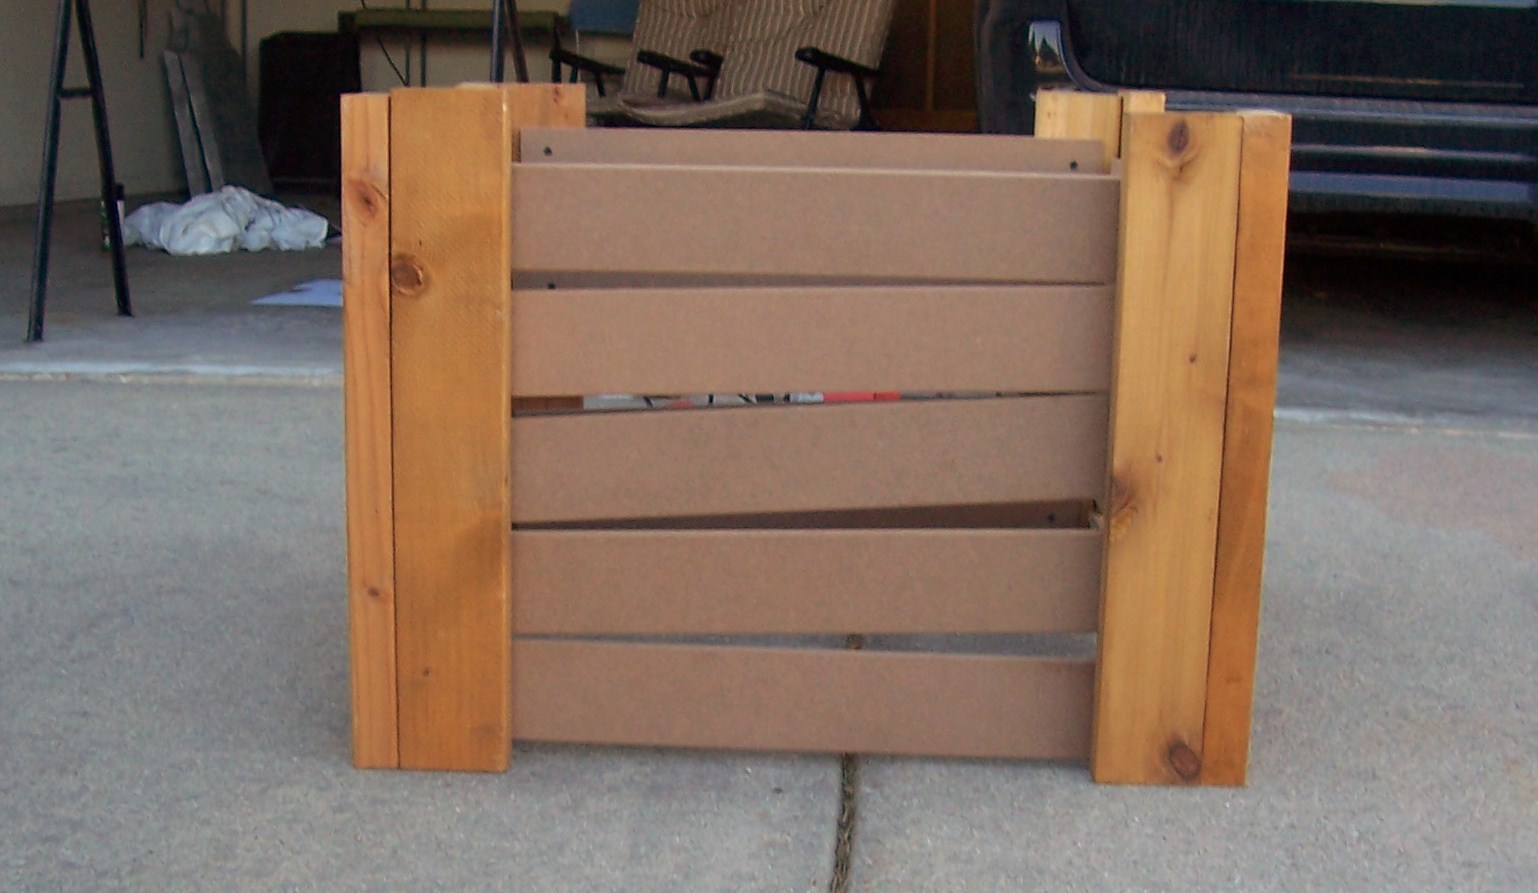
While my friend Sam was working on the stencil, I started screwing in the boards to the posts. Observe that I purposely made them crooked.


Then the box started coming together. The boards themselves are two feet in length. I bought that compressed wood at Menards for only $1.97 per 8 foot board. Very reasonable!


Eighty screws later, and it's almost complete.


We then used the stencil and some black spray paint to transfer the letters onto the front of the box.


So hopefully you enjoyed this small insight into the creation of another prop. I can't wait to see how this will look with all the show lighting in the scene. It should be excellent!

9/11/2011

Continuation

A lot has been going on, but not much to present this week.

Work has begun on a new Ouija Board Box. We used to just have a cardboard box that the Ouija Board would sit in, but now we're constructing a permanent, custom built wooden crate. With some new lighting, this will really make the Ouija Board a focal point in the attic scene. While it's not necessarily something that needed to get done, it will look really neat once finished.

Work on the lightning effect has progressed. I had to bail on the halogen light bulbs we were going to use.You know how that turned out from the last post. We now have a 100 watt CFL. It's 4,100 Kelvin, so it's a bright white color - quite perfect!

On a last note, it's really getting crazy with all the work that has to go into this, and with how much stuff I'm having to do being a full time student in college right now. But will it pay off in the end? You bet!!!


9/04/2011

Lightning Strikes

It's labor day weekend - the end of the summer months, and the beginning of the Halloween season. With theme parks already decked out in their Halloween garb, and parties already beginning early September, it is now officially time to celebrate the season!

For these upcoming two crazy months, I'll be continually updating on status, and come October, set up of the haunt. So spread the word, share in the spirited season, and most of all enjoy yourself as you venture out to haunts both near and far...

This week started by finishing the "updates" for the shrine table. We permanently attached the legs to the table this time, as I'm giving up on trying to make this thing store away easily. I found a spot to keep it in the basement. Anyways, we added a neat swath of red fabric. I bought it online for very cheap (less than $10) and then stitched together one end of it so a white strip along an edge of the fabric would no longer be visible. It's something cheap, but it really brings an layer of "ornateness" to this custom built prop.

As for Lillian and William's tombstones, they are now completely finished. This past week, we got the embedded text painted a dark gray, and imo, they turned out great!


And finally, we worked on our lightning effect a bit more. Note to self: don't force halogen light bulbs to fit into sockets they're not supposed to enter. In our case, we blew a bulb right away. No, it didn't blow up, but it's interior imploded, causing a bright, cool white flash. Just the effect I'm looking for!

Happy Labor Day!