Showing posts with label 2008. Show all posts

9/19/2011

Ouija Board Crate

First off, my apologies for getting this post out late. It's just been very crazy with the start of the school year again. So much to do!

This week, work completed on the Ouija Board Crate. This crate will now serve as a permanent home for the Ouija Board - the centerpiece effect of the attic scene. Note that before we'd just use a cardboard box - and get a new one year after year. Now, we have something that is themed a bit better - a "plussing" of a prop, to throw around an Imagineering term.

For a formal definition, we can turn to the Liar's Guide to Disneyland...
"Plussing" something means making it a little bit better. For example, a Mickey Mouse hat plusses a guest's head (24).

With that term defined, let's move onto the construction process of this original prop.
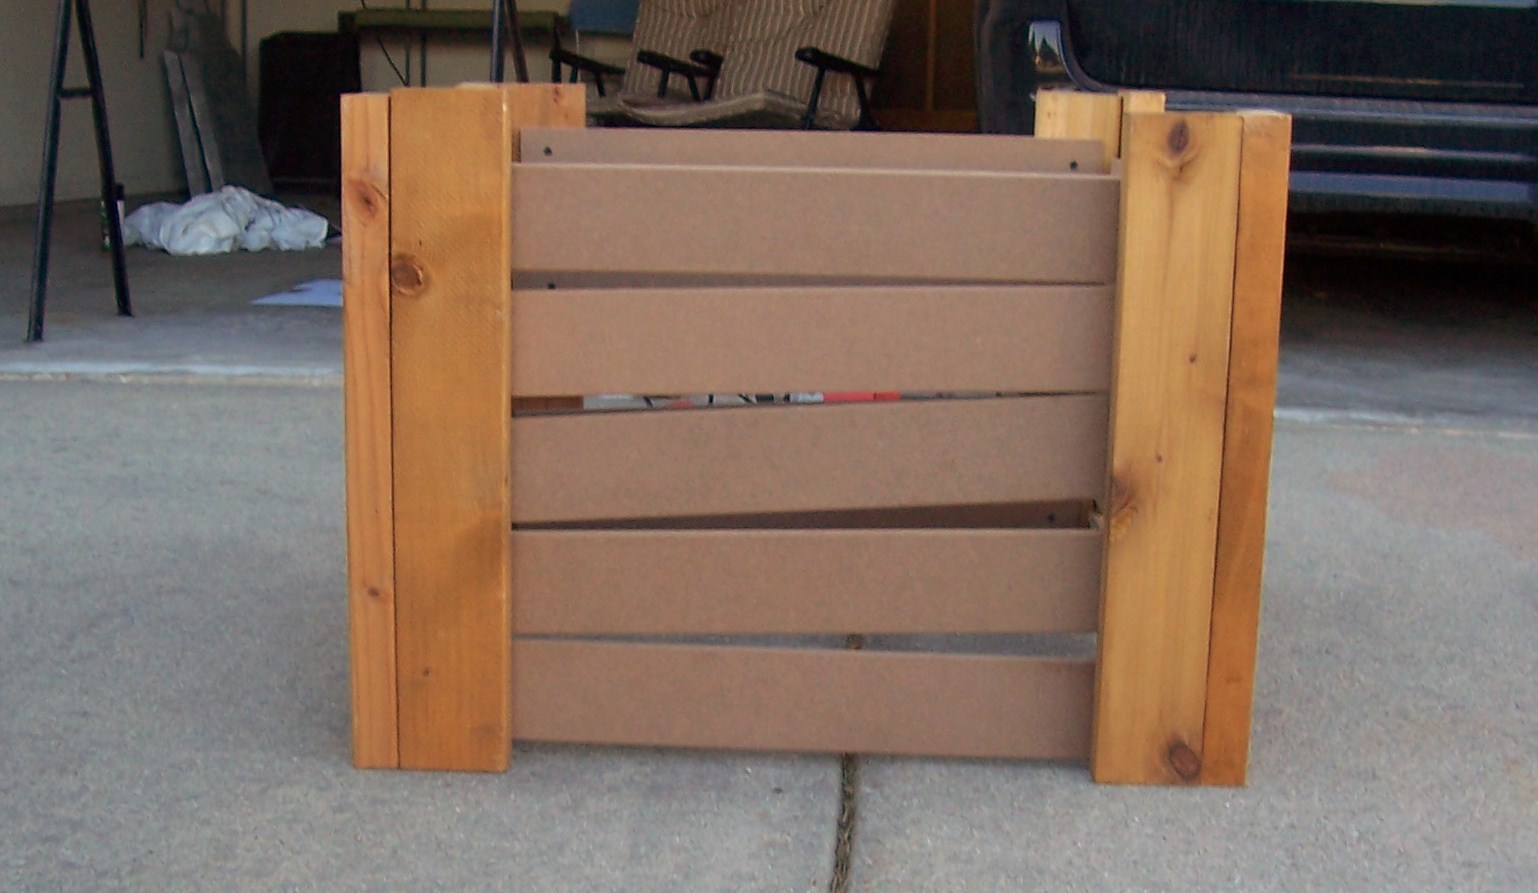
We started by staining the four posts of the box, which are constructed of two pieces of wood nailed together to form an "L" shape.


 After that was completed, we did a color test by staining one of the pieces of compressed wood that is being used for the boards, or sides of the box. The board just soaked up the stain, leaving it a dark purple in color. That would not do, so we decided against staining the boards.


We then created a stencil out of computer paper for the word "attic" - so the audience knows they're looking into an attic scene (Note: only one other box in the attic scene has the word "attic" spray painted onto it that is still around. When the attic scene first debuted in 2007, the original Ouija Board cardboard box had "attic" spray painted on as well, but in 2008 and 2010, we never got around to adding it again).


While my friend Sam was working on the stencil, I started screwing in the boards to the posts. Observe that I purposely made them crooked.


Then the box started coming together. The boards themselves are two feet in length. I bought that compressed wood at Menards for only $1.97 per 8 foot board. Very reasonable!


Eighty screws later, and it's almost complete.


We then used the stencil and some black spray paint to transfer the letters onto the front of the box.


So hopefully you enjoyed this small insight into the creation of another prop. I can't wait to see how this will look with all the show lighting in the scene. It should be excellent!

8/08/2011

Attic Concepts 2008

This past week, I recently went through my Halloween archive, and found many, many pieces of concept art from years of Halloween extending all the way back from 2004 until 2010. I then scanned all of these images into the computer. Because of this, in coming weeks, months, and years, you'll see old concepts that never came to fruition, or ideas that did evolve into reality.

This week, I'm sharing a collage of attic concepts that I drew up in 2008.

Enjoy!


8/01/2011

Concept to Reality: The Estate Sign

The Greywood Manor estate sign, pictured below, was one of the main projects I took on for the 2010 season. Although Greywood Manor was the name of the haunt starting all the way back in late 2008, there really was no prominent sign that told the audience they were visiting the house of the Greywood family.

Greywood Manor Estate Sign - 2010, in action!
This, however, was an idea that has it's roots all the way back, three years earlier, in 2008. Through the concept images I'm about to display, you'll get an idea of how an project grows from concept to reality.

In early 2008, one of the concept pieces I drew of the exterior of the mansion shows a Gracy Manor estate sign. Notice the design, as it is just a simple plywood board attached to a stake. "Gracy Manor" was also the name I was throwing around before I decided upon the name "Greywood." The name "Gracy" is of course a tribute to the Haunted Mansion. Master Gracey (with an "e") is the supposed owner of Disney's haunt.

This rendering is the first time that my estate sign was visualized on paper.

Estate Sign Concept: Early 2008
So the idea sat, and didn't progress at all that year. Then, in 2009, I thought it was about time to start construction on this project. I refined the look of the sign, and drew up a dimensional sketch for reference while constructing the piece. Unfortunately, I ran out of time in 2009 to actually finish. The idea did not die, however, as I just delayed construction until 2010.

Estate Sign Dimensions, 2009
Construction then began in 2010. To finalize what I wanted the piece to look like, I drew one more concept - an image of what I wanted the completed project to look like.

Estate Sign Concept, 2010
Construction then began with me choosing between some stain colors. I created test patches on a few wooden shims, and then began to stain, and paint my pieces. Note that the hanging sign portion of the prop is stained, while the letters are painted a metallic gold, and outlined with a flat black paint to create the illusion of depth on the flat surface.

So many choices...
Finally, I needed an ornate, iron piece to display on the top, horizontal bar of the sign. I went online, and found this neat door topper piece from Heavy Hitter Ind. Inc. I used one of the side pieces, painted it the same metallic gold as the letters on the sign, and finally finished this project.

Just a bit of paint, and it's perfect!
For 2011, am I going to improve upon this estate sign? Possibly. I'm throwing the idea around for adding some LED lights into the mix so the sign will light up at night, but so far, that's still Blue Sky. If not this year, possibly just the next.

6/05/2011

Props Part 3

For the third week in a row, we'll be taking a look at three different props. This time again, all the props are featured in the attic scene.

This chandelier painting on canvas was bought at a Hobby Lobby store. It's interesting, but is not an integral part of the story. It does go along with the real chandelier hanging in the attic though!


This next prop is an Underwood Typewriter. Yes, it's a real antique, but it no longer works properly. I found this through Craig's List. Luckily it was only $20.


The final prop being examined this week is a cage. Two weeks ago, we featured a smaller bird cage. This cage, however, could theoretically hold any small animal. This prop too was bought at Hobby Lobby. It's strictly for decorative purposes, but in the future we might enhance this otherwise stagnant prop.


5/29/2011

Props Part 2

This week, we'll look at various paper props.

First off is the Ouija Board. This particular board was bought at a Toys R Us quite awhile ago. It is, in fact, just a simple board game from Hasbro and Parker Brothers. If you want to see more on how the Ouija Board animation works in our attic scene, visit an older blog post all about it here.


Next is an image of the Saukville Examiner newspaper from October 1, 1950. This is also a prop I have covered in depth in earlier posts. View the Saukville Examiner's ConceptionDesign, and Execution at the links provided.


Finally is a photo of the Resurrection Spell that is displayed on the "shrine table" in the attic scene. Supposedly, this spell from an old witchcraft book is what Elizabeth tried to use to summon her dead parents. Unfortunately, it didn't turn out too well.


5/22/2011

Props Part 1

This week, we continue to look at props found both in the attic, as well as in the cemetery.

First off is a 13-hour clock - custom made, and it actually works!
I replaced the face with a print out version of a '13' Hour Clock - a tribute to Disney's Haunted Mansion attraction. I painted the clock hands a blood red, so they would stand out against the mostly black and white face. The hands were originally black. The iron body was then painted and aged as well. It was originally a dark green, but we painted it gold and aged it using a dull brown.


This next prop is a birdcage that I found at a thrift store. It was not meant to really house a bird, as it has no door. Just the creepiness of an empty bird cage, with it's swing slowly swaying in the breeze is all this prop needs to bring a chill to the attic. 


Finally, this lantern, which really works, is housed in the cemetery. Although not oil burning, this lantern was made to look like one. It was already pre-aged, as it was bought online on a Halloween prop website.


2/27/2011

Greywood Manor 2007 & 2008

In my first main post, Greywood Manor 2010,
I displayed a video of this past year's 2010 haunt.
Today, I'd like to showcase a collage of how it looked years back, in 2007 and 2008.


2007 was the first year I created the attic scene.

2008 followed, with slight changes.

As 2009 was my freshman year in college, I did not know how much work to expect. Thusly, the attic scene was not set up that year. The only decor set up was the graveyard - a constant since before 2007.

And as we've seen, 2010 brought the attic's triumphant return, again with slight changes.

2011 is looking to be an iconic year as well - not with a resurrection - but with the addition of the "holiday overlay" props that have been worked into the back-story but that have never actually been displayed before. Stay tuned to this blog, as I have some fascinating posts in the works!